Alu PCR Lab
Purpose: To understand and determine the frequency of the Alu insert into the gel using PCR in the STEM classroom.
Hypothesis: If my cheeks cells are correctly prepared for a PCR reaction and inserted into the Alu, then the allele designation will be +/- (heterozygous).
- -10mL slaine solution
- -cheek cells
- -paper cup
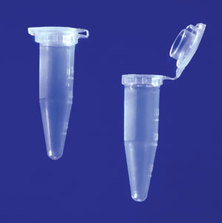
- -21.5 mL microfuge tube
- -permanent marker
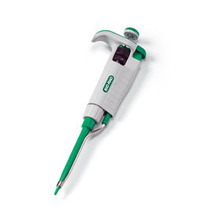
- -p-1000 micropipet
- -microcentrifuge
- -chelex
- -p-100 micropipet
- -p-200 micropipet
- -heat block
- -thermal cycler
- -tips for p-20 micropipet
- -tips for p-100 micropipet
- -tips for p-200 micropipet
- -tips for p-1000 micropipet
- -microfuge tube racks
- -ice
- -DNA stain solution
- -power source
|
|
Procedure:
1. Swirl 10 mL of saline solution in your mouth for 30 seconds.
2. Spit saline into a cup and swish the cup around to mix the cells.
3. Label a tube with your initials (PIN).
4. Transfer 1000 microliters of the saline solution into your labeled microfuge tube.
5. Spin your saline cell suspension in a microcentrifuge for one minute to pellet the cells.
6. Observe cell pellet, and pour out the superlatant until there is only about 100 microliters remaining. Be sure not to pour out the pellet while pouring out the supernatant.
7.Check to make sure that there is about 100 µL of saline covering your cell pellet. Shake or rack your tube to mix the cells, which will “suspend” the pellet and make a mixed solution.
8. Obtain a tube of Chelex from your instructor. Label with your PIN.
9. Withdraw 50 µL of your cell suspension from step 7 and add it to the tube containing Chelex.
10. Take your 1.5 mL microfuge tube of chelex to a heat block station. Slide a cap lock onto the tube lid to assure the cap does not come off from the pressure and place it in the heat block for 10 minutes. Keep track of your tube in the heat block.
11. After heating, gently remove the cap lock and open the tube slowly to release the pressure. Close the tube back up and then rack or shake the tube well to mix it, and place it in a centrifuge to spin once again for 1 minute.
12. Obtain another clean microfuge tube and label it with your PIN, and also write “DNA” on this tube.
13. Holding your tube at eye level, use a P-200 to withdraw 50 µL of the supernatant from the Chelex/DNA tube to the new, empty, labeled tube. Make sure NOT to transfer any of the Chelex beads.
14. Make sure no Chelex beads were transferred into the “DNA” tube, as it interferes with the PCR.
15. Place your DNA tube in the class rack. Your teacher will refrigerate your DNA tubes until you are ready to prepare your PCR amplification.
16. Obtain the smallest size PCR tube. Label it with your PIN number, just under the lip and on the top, if possible.
17. Pipet 20 µL of Master Mix into your PCR tube.
18. Change your pipet tip and add 20 µL of Primer Mix into your PCR tube.
19. With a new pipet tip, add 10 µL of your extracted DNA into your PCR tube.
20. Setting up the controls: a. Two students will be asked to set up the positive control reactions (+C) for the class. They will use the positive control DNA provided in the kit. There should be enough +C PCR sample for one lane on each gel. b. Another two students will set up negative control reactions for the whole class (–C). They will use sterile water. There should be enough –C PCR sample for one lane on each gel.
21. Check the volume of your PCR tube by comparing it to a reference PCR tube with 50 µL in it. It should be near the thermal cycler, set by your teacher.
22. Place your reaction into the thermal cycler and record the location of your tube on the grid provided by your teacher.
23. The cycling protocol for amplification of Alu PV92: 1) 95°C hold for 2 minutes 2) 30 cycles of: 94°C for 30 seconds 60°C for 30 seconds 72°C for 2 minutes 3) 72°C hold for 10 minutes 4) 4°C hold, ∞ infinity
Result: I have a homozygous allele.
Reflection/Analysis: For volumes 1-20 µL, the correct micropipet to use would be P-20. For volumes 20-200 µL, the correct micropipet would P-200. Finally, for volumes 200-1000 µL, the correct micropipet would be P-1000. Both the P-200 and P-1000 can do 100 µL, but the P-200 would work better. Three suggestions I have are to use the smallest micropipet possible for more accuracy, add volumes starting from the smallest and going up to the largest volumes, and making sure to clearly label all of the tubes to ensure you stay organized. I measured my percent of error and it was 15% for the first two trials, and 49% for the last trial. My results were relatively accurate with little error.
